The Wondershare Filmora9 is one of the best video editing tools that have been quite popular recently.
Maybe it is because of the fact that it is very simple to use and also has all the necessary tools that a video editor might need.
The interface is clean and modern, while the functions are easy to access. Additionally, the Wondershare Filmora9 can be used both on Windows and Mac.
Exploring Wondershare Filmora9
Home Screen
On opening Wondershare Filmora9, we see the screen given below.
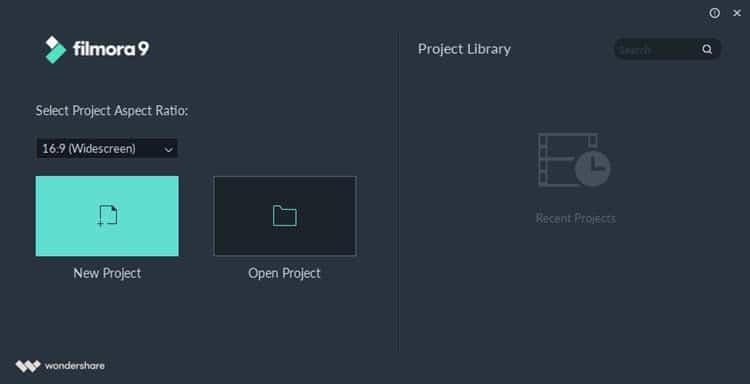
One can start video editing with Filmora9 from here. The features included here are-
- The user can choose the required aspect ratio for the video that is to be edited.
- All such aspect ratios like 16:9 for most devices, 1:1 for Instagram, 4:3 for the standard show, 21:9 for widescreen and 9:16 for the portrait are covered.
- New projects can be started and old ones can be saved.
- Recent projects are shown in the right for easy access.
User Interface
Given below is the user interface of Wondershare Filmora9 which is very simple.
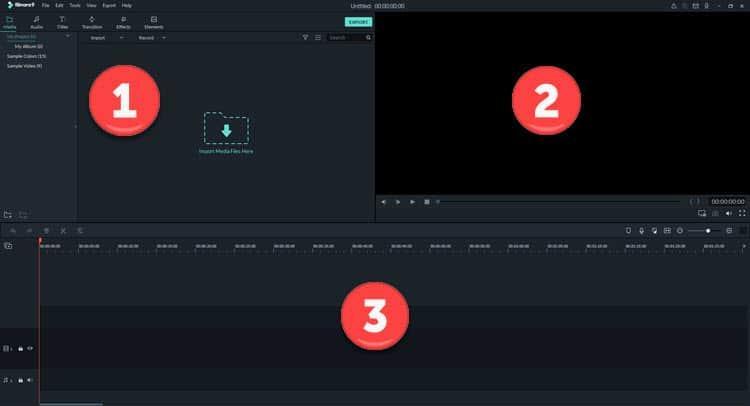
There are 3 sections in the user interface which can be customized to suit the user’s needs.
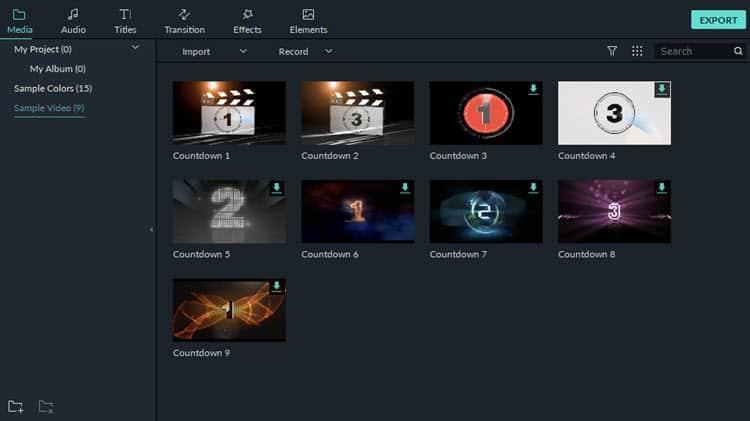
1. The part with number 1 marked on it is the library where videos and audios can be organized and used with various effects and filters. Media can also be imported here. There is a tool called instant cutter that can help the user choose a particular part of a video only. This is important as the video gets trimmed even before the actual work is started on it.
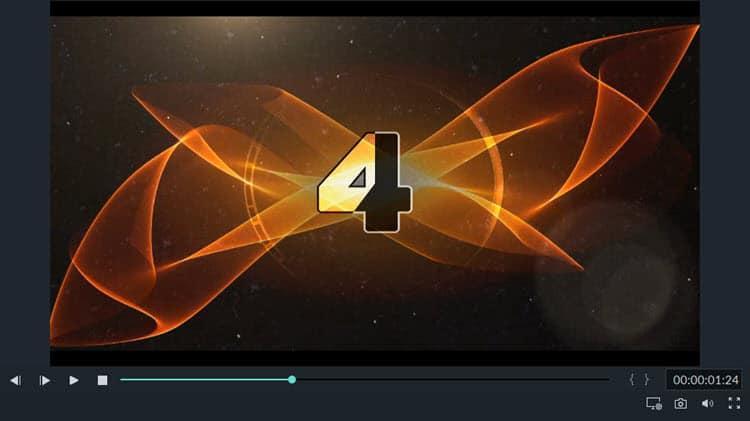
2. The part with number 2 marked on it is the preview window. Here a part of the clip or the entire video can be checked before exporting it.
3. The part with number 3 marked on it is the timeline for addition, arrangement and editing of the whole video or the separate video clips individually. Editing is very easy, and it mainly works on a ‘drop and drag’ system. This is where the filters, transitions and special effects can be applied. There are even advanced tools present that can enact the user to complete the various required parts in the complete video editing process. In short, this timeline is the main part where most of the video editing and its workings are introduced and checked.
The buttons present clearly states their respective functions. A video file can be cut in the middle or any part with the scissor icon. The cursor can be used to determine the duration of a file. The unnecessary items can be deleted after selection.
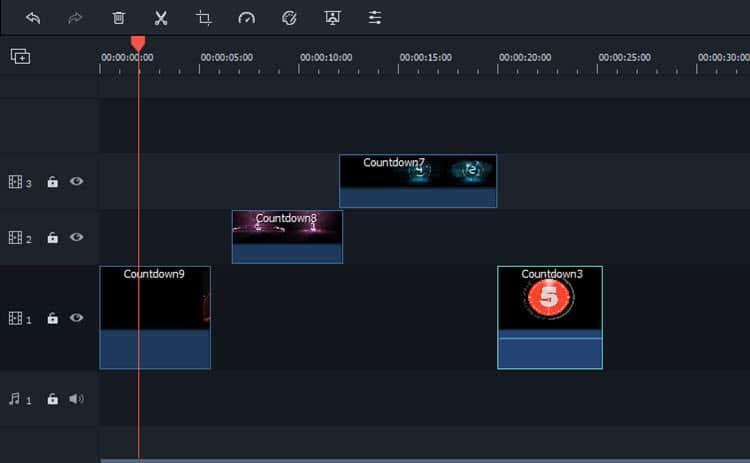
The Editing Tools
A lot of different editing tools are present in Wondershare Filmora9, making it much easier for the user to be able to edit the video with ease and comfort.
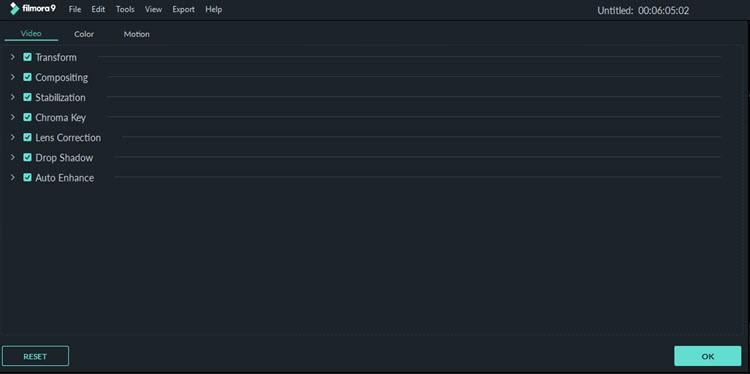
Here one can see 7 different types of video editing tools which are quite brilliant and can help a user to edit a video with all required characteristics.
The transform tool is mainly used for sizing and rotation, composting is for applying modes in overlays and various transitions, stabilization tool makes sure that the video output becomes stable enough, the chroma key is for colour correction, lens correction can be used for having different optical effects of action cameras, drop shadow is for adding a shadow visualization over the entire work or in selective parts and auto enhance is there to add a final touch to the completed project.
All of the tools are completely customizable and the user can use them manually for required actions.
Colour Correction
There is also a presence of a colour correction tool which helps in correcting the colour and the grade of the videos as well.
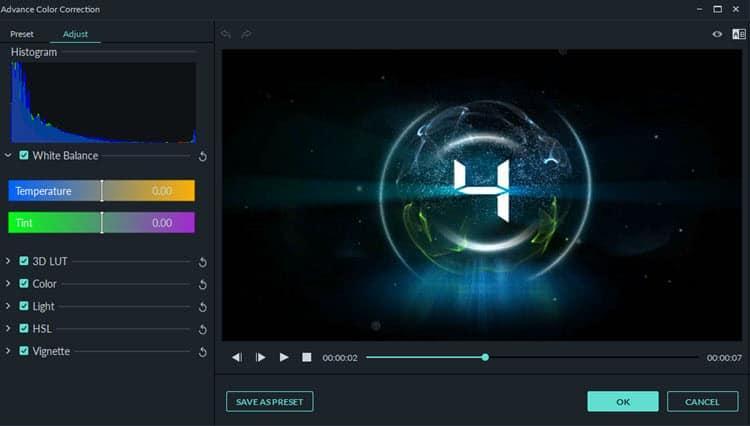
Green Screen
Green Screen or the Chroma Key handles different coloured applications and lets the user change it for effects. The user can choose the key out the colour of a video through this tool.
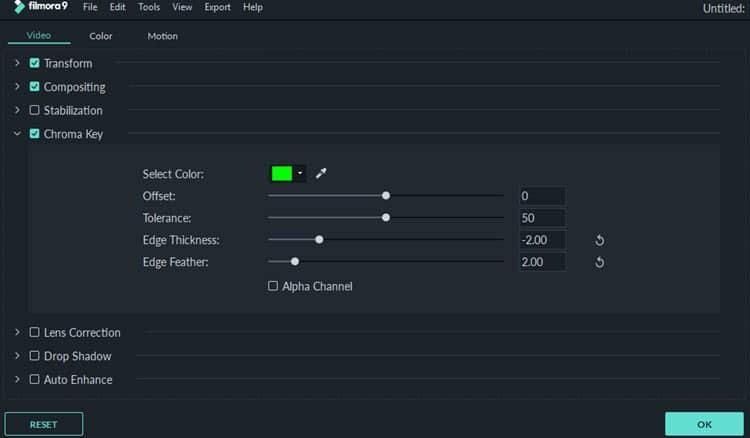
Effects and Transitions
In Wondershare Filmora9, there are over 300 special effects with objects, sound effects, transitions and overlays that can be applied. There are 51 inbuilt audio samples including 26 tracks of music and 25 effects of sound that can be used. There are also 191 mask elements, 137 titles presets that can be adjusted, 178 transitions, 87 overlays and 158 filters. Animations are also available using the pan and zoom for both still images and text. Motion elements can be applied on graphics too.
Video Exporting
The module for the video exporting is given below.
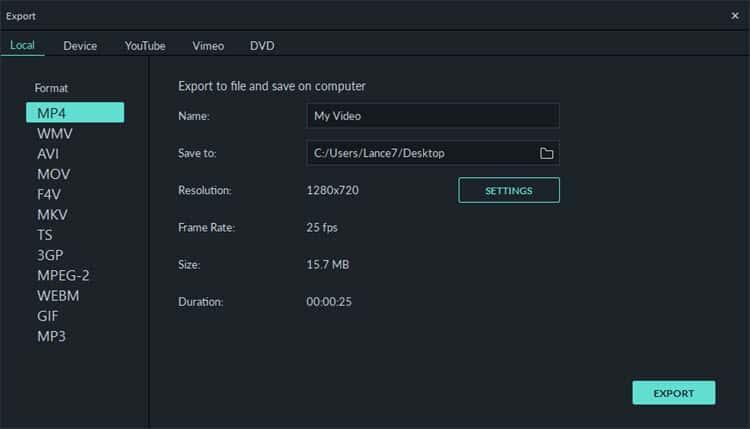
Before exporting the final video, the user gets five main choices. The local is for selecting the video format. The device can determine the platform where the video will run, like smartphone, tablets etc. YouTube and Vimeo are there for helping the user upload the video directly. DVD provides the video file to burn into DVDs and vice versa.
All of the above parameters can be customized as per the user’s preference.
Extra features
Apart from its original features, the Wondershare Filmora9 has also included some extra features which include a screen recorder for the recording of the work process or capturing certain part of a video to be used later, motion paths that can induce effects following the movements, audio equalizer where external noise can be checked and filtered out of the video and a graphic equalizer for stabilizing the movement of the graphics along with the audio fluctuation as well.
Conclusion
The Wondershare Filmora9 is upgraded much vastly from its previous version. The features have been upgraded and increased while the appearance is still simple and easy to understand and use. A lot of new features have been introduced as per the demands of the regular users, so it is expected that both the old and new users will be satisfied even more. Regardless of how advanced it has become, the simple appearance and easy to understand user interface makes the Wondershare Filmora9 one of the best video editors that is currently present in the market.


