You have got an Android device? The device manufacturer whether it’s Samsung Or Google just released an update for your device?. On Mobile devices, we have a thing called OTA update or Over the Air update, the device manufacturer sends an OTA update which then received by the user on their device and they can install directly by downloading the update on their android device. Now in some cases, not everyone gets the update at the same time the update is released region wise or the server takes time to deliver an update to all the users. In that case, the update file also gets released on the developer’s website which can be installed through ADB if you really want to install it as soon as possible. Then you might be wondering on how to install the update from ADB then you have reached the right place.
We will guide you on how to install the OTA update sent by your device manufacturer to your Android devices. It doesn’t matter what device you are using, procedures are still the same. Now for this tutorial, we will take the Google Pixel 2 XL as an example and same you can do with other Phones.
What is ADB
ADB or Android debug bridge is basically a command-line tool which you can use to communicate to Android devices. When you want to test your app in Android Studio, either you will use is an emulator or an Android device or in case you want to install an update from your computer to your Android device.
Here the bridge talks to the Android device behind the scene, so what exactly happens is, there is an ADB server running in the background and the command line then connects to that port whenever it needs the Android device and this handles the request for launching or starting your device, your app or even transfer files to your Android device.
You also have a command-line interface available more like a Linux like the interface and you can run various commands and also see the output, logs also you can see a list of devices which are connected. In simple word, ADB is basically a bridge between the command line interface and your device hopefully now you have a basic idea of what ADB is and where it is used.
Prerequisites
To get started we will require a couple of things. First of all, it needs a computer, either Windows, MAC or Linux. We are going to use Windows 10 for this tutorial but again the procedure is still the same for another operating system.
We also need some software which is called Minimal ADB & Fastboot or Android Studio. Lastly for your specific device and model number you need to download the update from your device manufacturer’s website. Now as we are using Google Pixel 2XL, you need to go to the developer.android.com where you can see other devices as well and download the latest version of Android available for your device.
So now when you have downloaded the update ( .zip file ) for your particular device, you need to extract it to the same folder where you have configured the ADB and Fastboot. Now you have to configure a few things on your phone too.
Enable the Developer options:
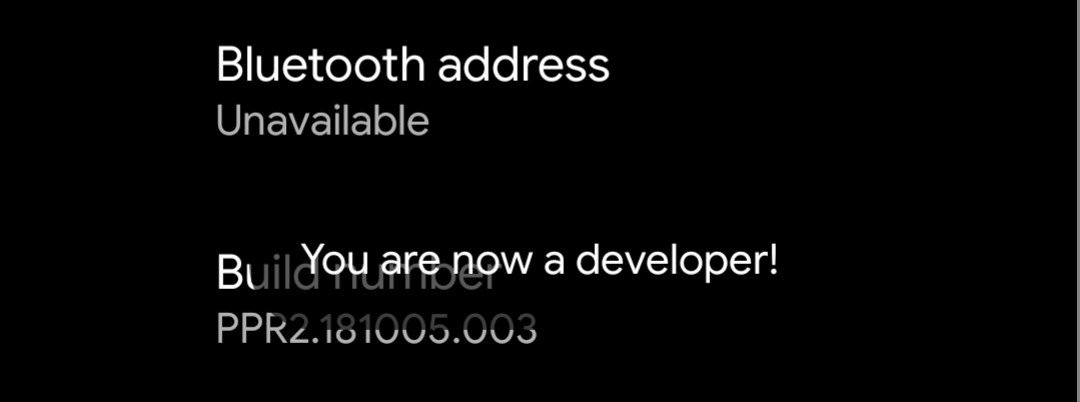
You can do that by going to Settings, then About Phone, then clicking the Build number 7 times. This will enable the hidden developer options on your device.

Enable USB debugging:
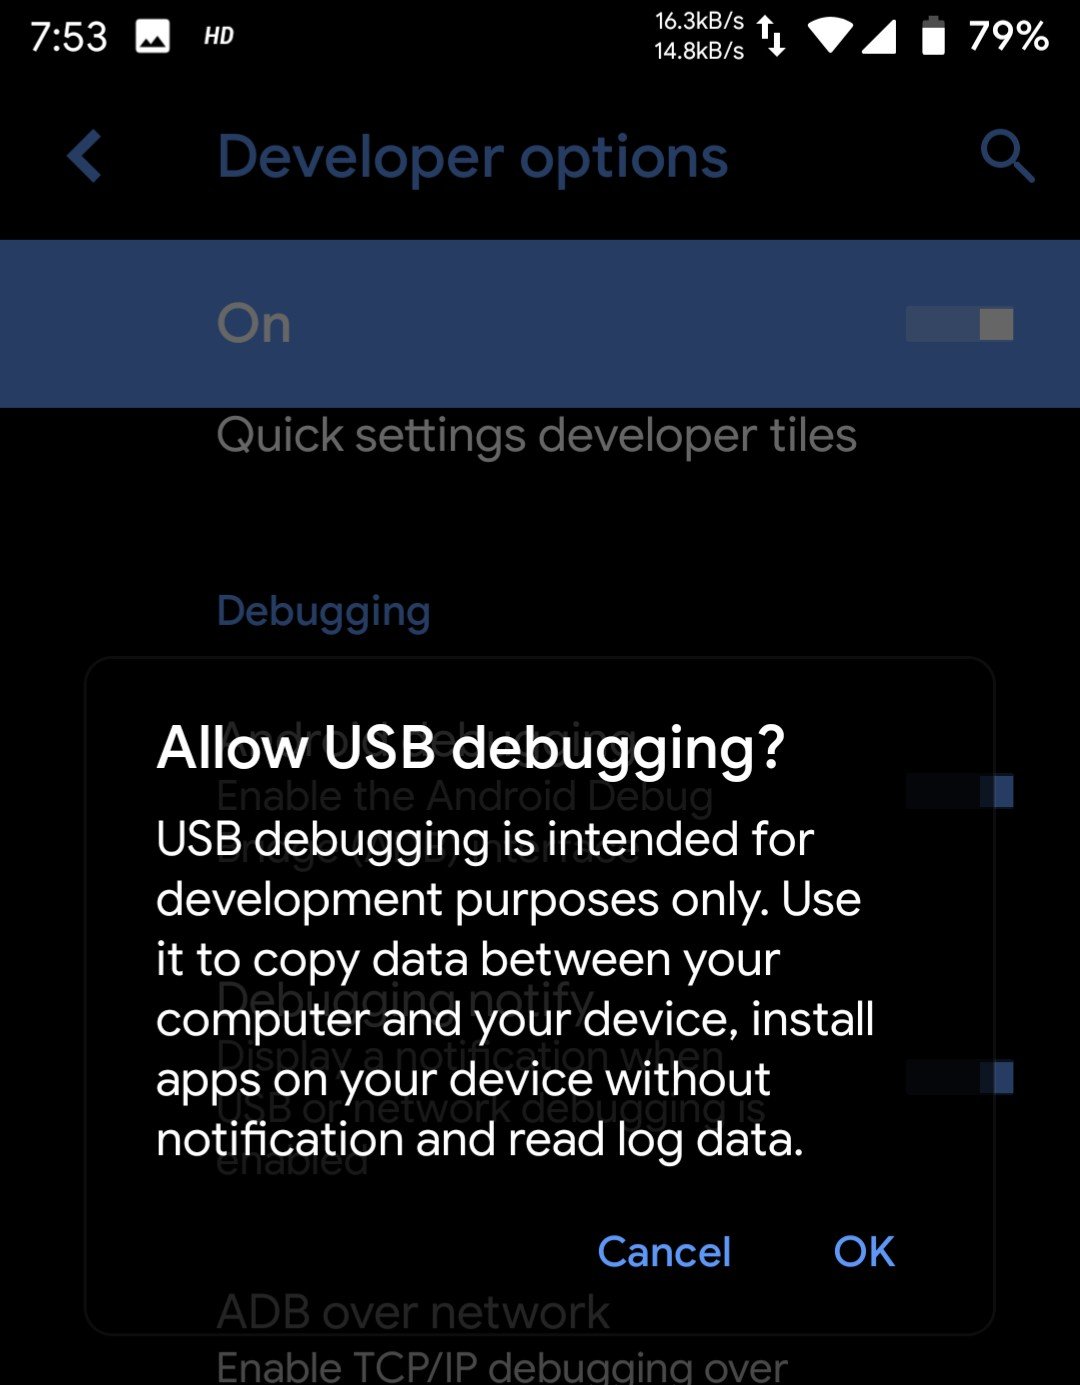
You must enable this option, otherwise, you will not be able to detect your phone in ADB. To enable this setting go to settings, then Developer options, now scroll down to find USB debugging option and enable it.

How to apply update from ADB
There are two possible ways through which you can apply updates from ADB. You can either use Minimal ADB & Fastboot which gives you some files required for applying the update or if you have Android Studio installed, you can use that too. When using the Android studio make sure to install the latest Android development Kit which will give you the latest version of ADB and the Fastboot.
We are going to use the simplest way that is using the Minimal ADB & Fastboot for this particular tutorial as We’ve simplified the process of Mi Account Unlock Tool before. Now on your computer make sure you have pasted or extracted the update image file inside the Minimal ADB & fastboot folder.
- Press the Shift key and Ctrl key/Right Click together and click on “Open command window here”.
- This will open up the ADB command line Interface for you where you can enter your commands.
- Now enter the command ” adb devices” this command will show you the list of all ADB supported device connected to your computer.
- Check your Android device for any Dialog box like “Allow ADB debugging for this computer” make sure to check it and press “OK”. This will establish a bridge between your computer and the Android Device.
- After you have done that you can see a serial number on the screen just below where you have typed the command. This means your device is now connected to the computer.
- Now type another command “adb reboot recovery” this will reboot the device and open up the recovery mode.
- You can see a (!) Exclamation icon on your phone and it may ask you to press any button to do that.
- Now once you are in the recovery mode you can see few options like “Apply update from ADB” to select this option you have to use the volume buttons. Use volume up to move up on the list and use volume down to move down on the list, finally press the power button to select it.
- It will now show a message like “Select the package you want to apply” so now on your computer use the command interface and enter “ADB sideload OTA_FILENAME” make sure to enter the correct file name, you can copy and paste it too.
- Once you have done that, on the screen, you will see the update is loading so it makes take a bit amount of time.
- You can also see on your phone it will show “Finding the update package”, ” Opening update package” and so on. It is basically applying the update on your phone.
- Once the installation is done, it will show installation successful on the recovery screen.
- Now reboot the device from the recovery screen using volume and power buttons.
- This was the last step on How to install an update from ADB Sideload.
- Once your device is booted you can verify whether the update is installed or not by checking the build number or date or even the Android version if it was a Version update.
- So now you have successfully installed the update from ADB Sideload.
Final words
Now, this was a quick tutorial on how to install the update from ADB Sideload. Well, we suggest you to just wait for the update to get delivered on your device, it will not that such long and then install it directly on your device. Which is basically the safest way to get the update done. Anyways, hopefully, this guide has served you well on how to install the update from ADB Sideload. We hope we made it clear for you but still if you have something in mind don’t hesitate to let us know.


